
It's called the BACK RANK MATE.


|
In this lesson you're going to learn about one of the deadilest weapons you can use in your quest
to kill the enemy King. It's called the BACK RANK MATE. 
|
|
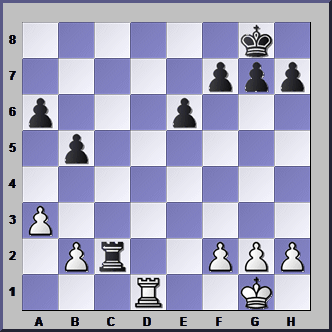
... if you're not very careful, this is what might happen. How can White score the winning goal in this position?  


|
|
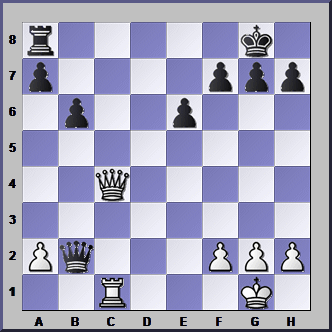
Really smart kids like you can learn to use this idea to play some really clever moves. Are you bright enough to tell me how White can force a quick CHECKMATE in this position?  


|
|
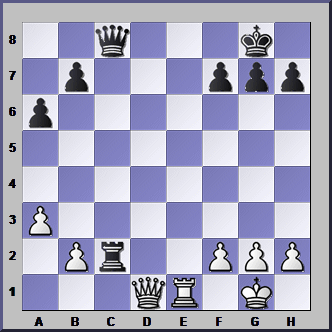
Can you find a really violent move that wins a piece?  


|
|
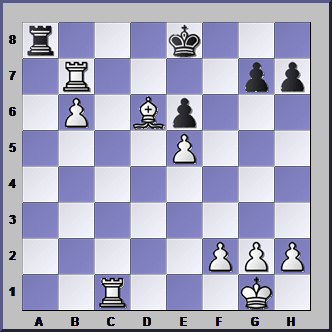
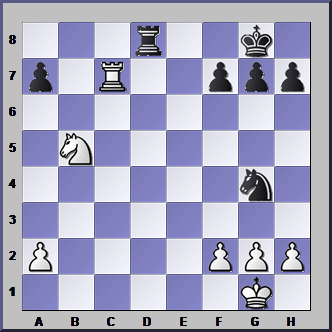
Just take a look at this position. White is winning easily. What would you advise him to do next?  Rb7xg7 Rb7xg7
 Rc1-c7 Rc1-c7 Offer a draw Offer a draw
 Resign Resign 

|
|
White moved his Rook on c1 (the goalie!) up the board. And Black's Rook came down the board to deliver CHECKMATE in two moves. Oh Dear!! 
|
|
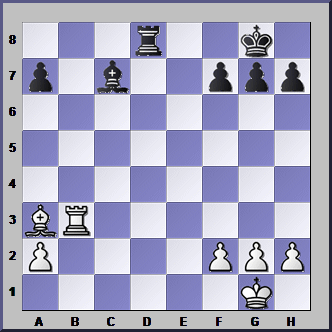
Try this position. Which Pawn should White move to stop the BACK RANK MATE?  The f-pawn The f-pawn
 The g-pawn The g-pawn The h-pawn The h-pawn
 The frogspawn The frogspawn 

|
|
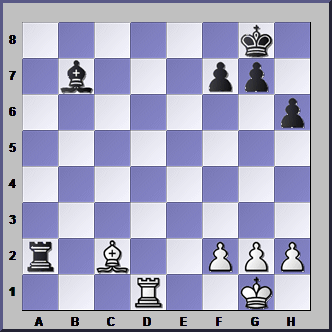
What would you call someone who played h2-h3 in this position? A really smart player A really smart player A really dumb player A really dumb player

|
|
Try to get used to these positions where a Bishop stops the King escaping. In this position White can get CHECKMATE at once because his Bishop CONTROLS h7. 
|
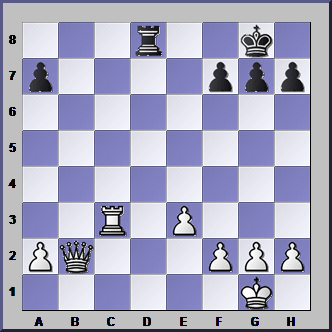
|
Suppose White captured the Black Queen, giving this position. What should Black play now?  


|
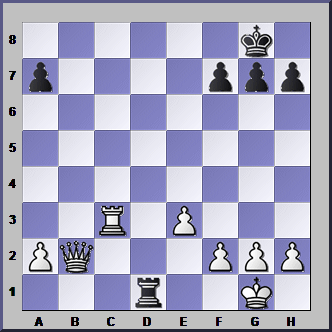
|
That was easy, wasn't it? CHECKMATE! But the next questions will be harder. 
|
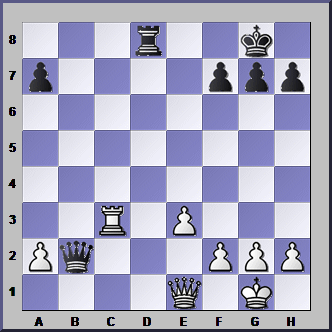
|
Now suppose White moves his Queen to e1 to defend his Rook. What would Black do here?  


|
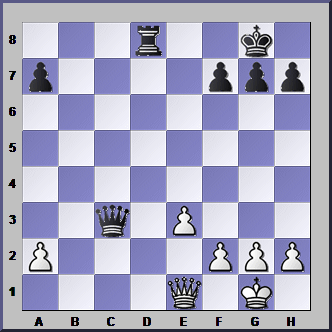
|
A tremendous move!! But an idea you've seen earlier in the lesson. Black can CAPTURE the Rook because there's a BACK RANK MATE if the Queen takes back. Do you see it? Well done if you got it right! 
|
|
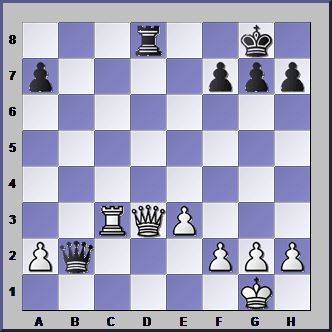
Now what happens if White plays the sneaky move Qe2-d3? Would it be a good idea for Black to take the Queen with his Rook?  Yes Yes No No

|
|
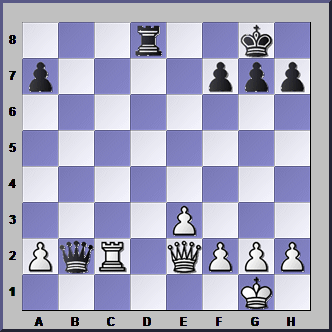
Which of these moves is best for Black now?  Qb2-b1+ Qb2-b1+ Qb2-a1+ Qb2-a1+

|
|
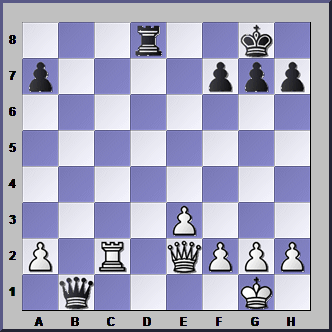
Take a look. White has to play his Queen to f1, and next move Black can take the Rook. OK? 
|
|
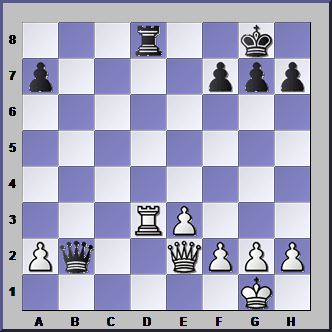
What would you suggest Black should do in this position? |

|
|