And, even more importantly, how to DEFEND your CASTLED KING.
By now you should know enough about chess to KNOW THAT you should usually castle quickly.
And you should UNDERSTAND WHY you should castle quickly.

|
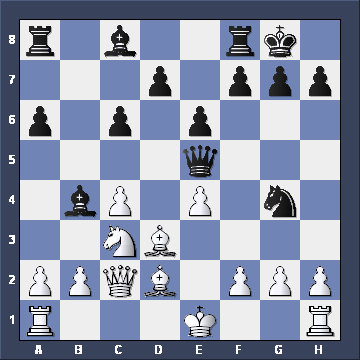
In this example it's WHITE's move. Would you advise him to castle on the King side here?  Yes Yes
 No No Don't know Don't know
 Don't care Don't care 

|
|
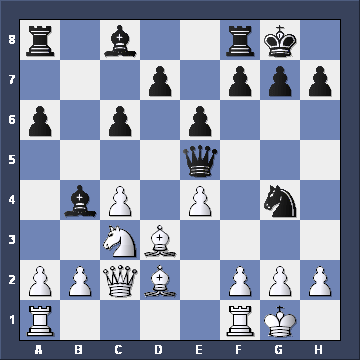
Well, White took your advice and castled in this position. Now tell me what happened next.  


|
|
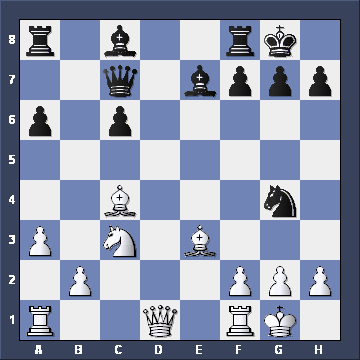
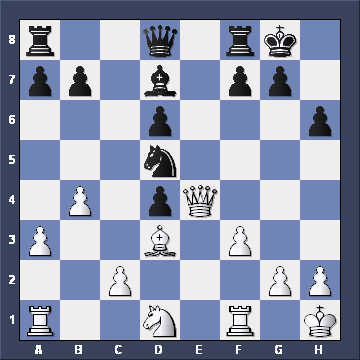
Let's see how you do on this question. It's WHITE'S move here. You know what happens to kids who get mated on h2. I wouldn't want to see it happen to you!  Qd1xg4 Qd1xg4
 f2-f4 f2-f4 g2-g3 g2-g3
 h2-h3 h2-h3 

|
|
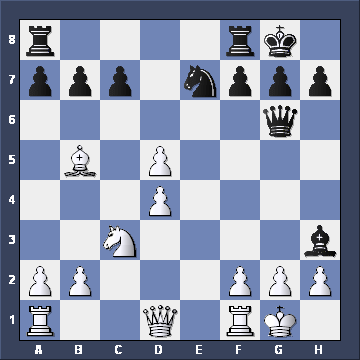
Don't even think about getting it wrong! It's BLACK'S move. Should he play...  Bd7-c6 Bd7-c6
 Nd5-f6 Nd5-f6 f7-f5 f7-f5
 g7-g6 g7-g6 

|
|


|
|
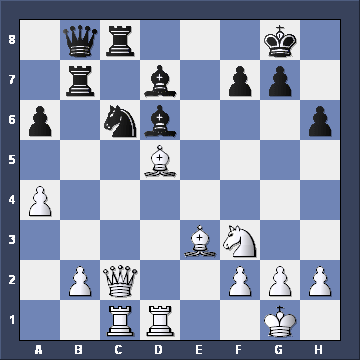
Now, a test of your attacking skills. In this game White unleashes her fire power on three squares: f7, g7 and h7. First, how did she use a PIN to THREATEN f7?  


|
|
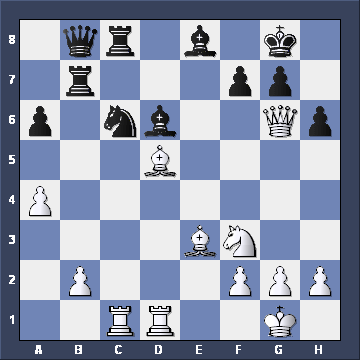
How did White exploit another PIN to THREATEN checkmate on g7?  


|
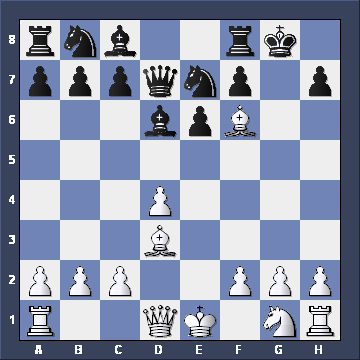
|
White can now play another SACRIFICE to force CHECKMATE. Can you find the killer move?  


|
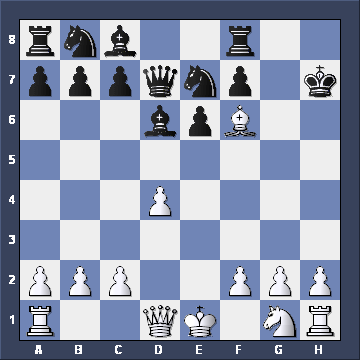
|
Splat!! A right uppercut smack between the eyes leaves Black up against the ropes. Black has only one move: Kg8xh7. Just one more punch will knock him out - what is it?  


|
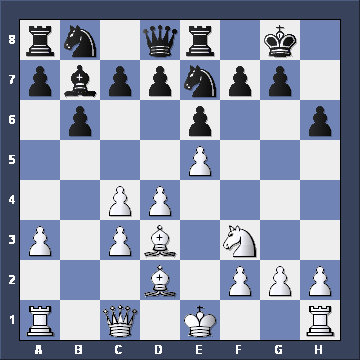
|
How did White break through with a SACRIFICE.  


|
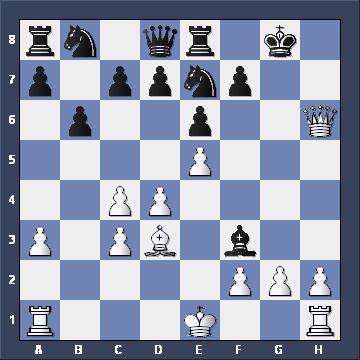
|
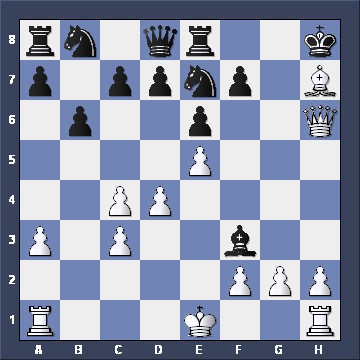
Is the first move...  Qh6-h7+ Qh6-h7+
 Qh6-g6+ Qh6-g6+ Qh6-g5+ Qh6-g5+
 Bd3-h7+ Bd3-h7+ 

|
|
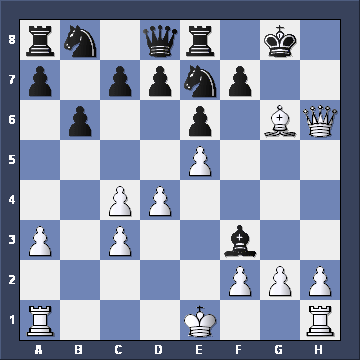
OK, what's the next move?  Bh7-g6+ Bh7-g6+
 Bh7-f5+ Bh7-f5+ Bh7-e4+ Bh7-e4+
 Bh7-d3+ Bh7-d3+ 

|
|
It's now mate in two for White, starting with...  


|

|
|