
Yes, you are going to guess EVERY ONE of the winner's moves.
And you are going to get EVERY ONE right.
OK?

|
|
For your last chessKIDS academy lesson (or very nearly the last) you are going to guess the moves of a game played by one of the all-time greats. Yes, you are going to guess EVERY ONE of the winner's moves. And you are going to get EVERY ONE right. OK?
|

|
We're going to travel back in time to the year 1858. Paul Morphy has been invited to the Opera House by two aristocrats, the Duke of Brunswick and Count Isouard de Vauvenargues. In the interval, they played this game. Paul Morphy was White, and you are going to guess his moves. It's possible you've seen this before. If so, see how much you can remember.
|
|
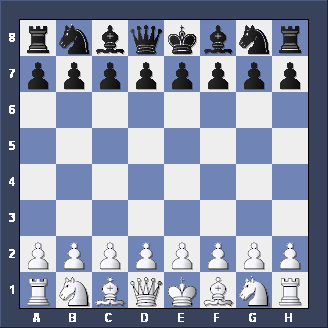
Here's your starting position. And, yes, Morphy played the first move preferred by most 19th century players. Come to think of it, it's probably also the move YOU prefer.  

|
|
Yes, Morphy played e2-e4 and the Duke and the Count replied, as most 19th century players did, with e7-e5. Morphy's second move was, again, the one you'd probably expect.
|
|
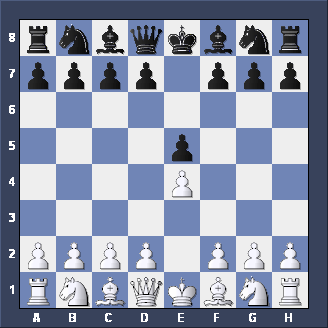
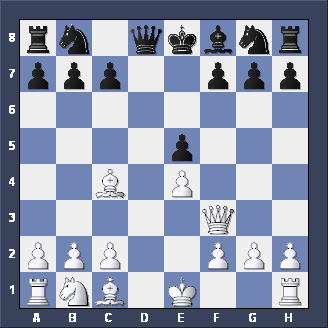
Paul played Ng1-f3, the usual move of course, and the allies opted for PHILIDOR'S DEFENSE - d7-d6. Do you remember the usual move in this opening?
|
|
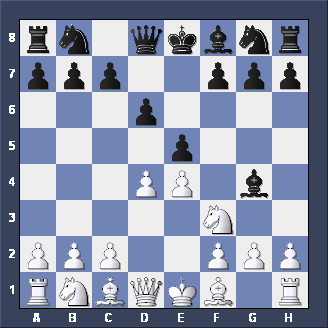
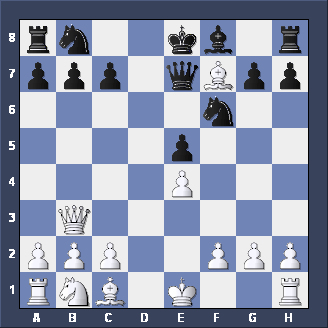
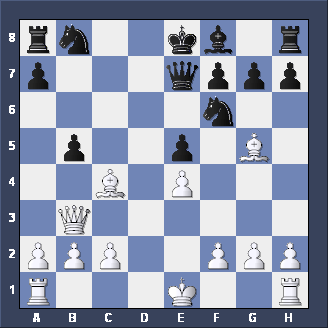
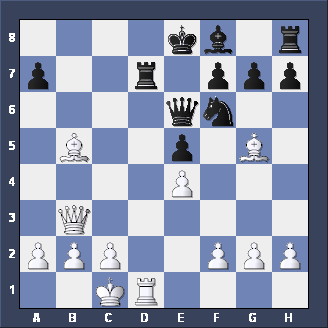
Morphy played the most popular move (even in his day), d2-d4. Black produced an unusual reply: Bc8-g4. White's next move gives him a clear advantage. You'll need to think a bit about this one.
|
|
The move we hoped you'd find was d4xe5. At first sight it looks a bit strange for White to give up his space advantage and release the Black King's Bishop. And on its own the move doesn't make a lot of sense. But if you LOOK AHEAD a few moves it makes perfect sense. The point is that if Black recaptures - d6xe5 - White will play Qd1xd8+, and, after Ke8xd8, Nf3xe5 winning a pawn in a good position. To play good chess you need to look at ALL CHECKS, CAPTURES and THREATS, and to LOOK AHEAD.
|
|
|
|
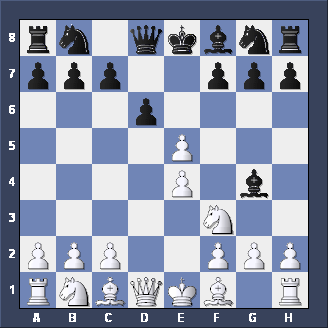
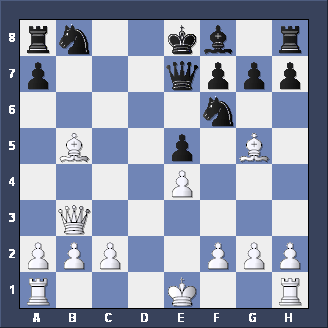
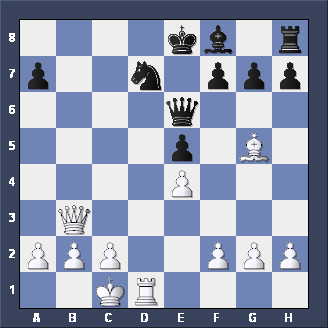
Morphy had a choice of recaptures, but Qd1xf3 was clearly better, bringing the Queen into play and avoiding DOUBLED PAWNS. Black now took back the pawn: d6xe5. There are several good moves here, but Paul's choice would be chosen by most beginners.
|
|
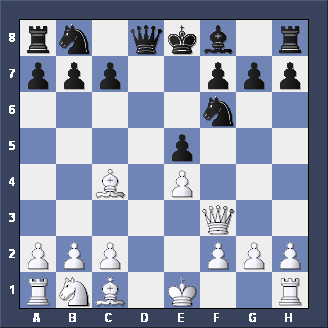
Morphy's move was Bf1-c4, threatening MATE on f7. There were other good choices as well - perhaps Nb1-c3 was the most obvious. If you chose that move you deserve some credit, but no points, I'm afraid. Now the consultants had to decide how to deal with the MATE THREAT. Qd8-f6 is probably best, but the more natural move played in the game turns out to be a mistake.
|
|
|
|
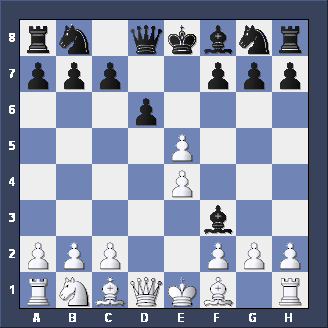
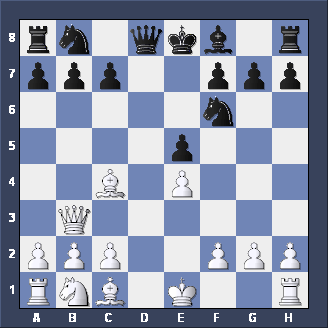
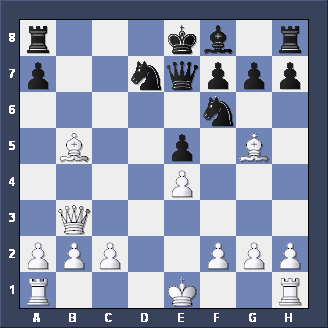
Qf1-b3 was the move we wanted you to find. It looks unnatural to move the Queen twice when there were plenty of good developing moves to choose from - Nb1-c3, Bc1-g5 or 0-0 for instance. But this is clearly the best move. It's a sort of QUEEN FORK. White has TWO THREATS - Qb3xb7 and Bc4xf7+ and Black cannot defend against both threats.
|
|
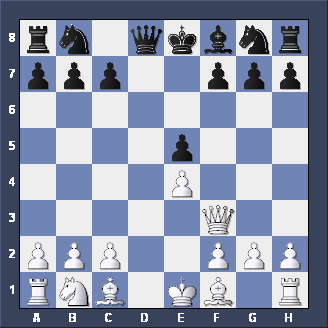
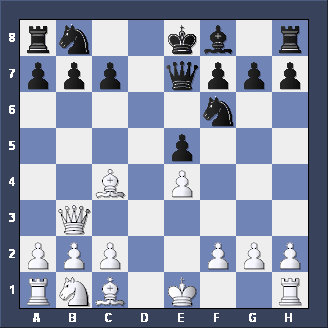
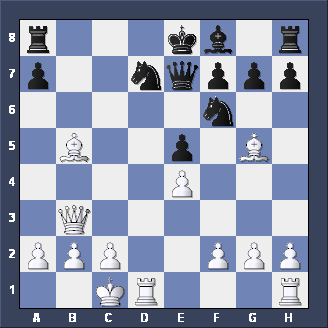
The allies chose Qd8-e7, rightly deciding that defending the f-pawn was more important than the b-pawn. Morphy's next move was maybe not the most obvious - think DEVELOPMENT!
|

|
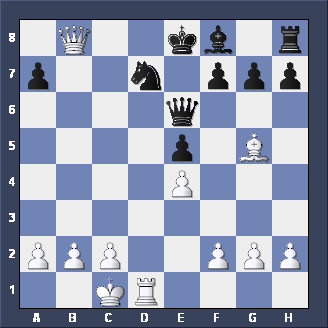
Let's stop here for a moment and look at a couple of moves that Morphy DIDN'T play. The most obvious move, I guess, was to take the b-pawn: Qb3xb7. But it wasn't what Morphy played. Why not? In fact there's nothing much wrong with the move. Black would now EXCHANGE QUEENS with Qe7-b4+ leaving Morphy a pawn ahead with the Queens off the board. Probably good enough to win - eventually - but Morphy wanted to finish the game before the interval was over so that he could watch the rest of the opera!
|
|
The idea of this is that after Qe7xf7 White can play Qb3xb7 and TRAP the Rook in the corner because Black can no longer EXCHANGE QUEENS. If you saw all that you're doing really well, but it's not the move Morphy chose. To see why we need to look a few moves further ahead.
|
|
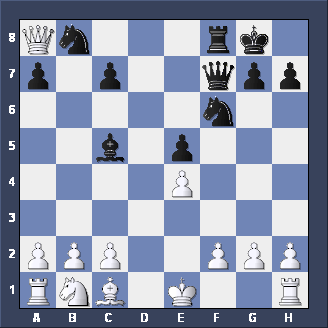
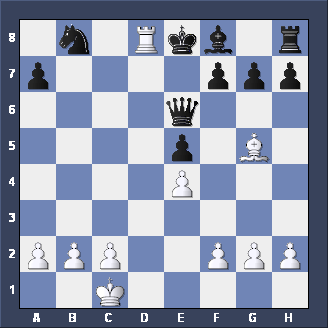
The game might then continue with the moves 8. Bc5xf7+ Qe7xf7 9. Qb3xb7 Bf8-c5 10. Qb7xa8 0-0 In this position (see diagram) White is well ahead on material but Black has a lot of COMPENSATION. White's only developed piece, his Queen, is in danger of getting trapped and Black suddenly has four pieces on strong attacking squares. I would guess Morphy decided this sort of position was just too scary. He always preferred (and you should too) to develop his own pieces rather than his opponents'!
|
|
|

|
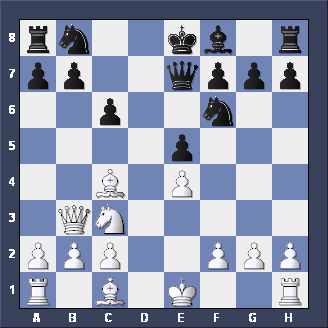
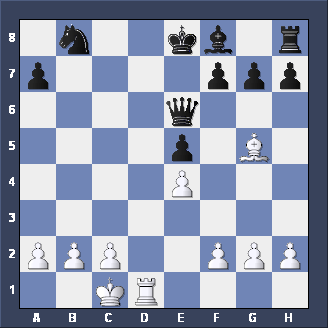
Let's stop and look at this position for a minute. White is clearly winning the race to get his pieces out. (Compare this with the variation that Morphy COULD have chosen last move.) Chess teachers often talk about the aim of CONNECTING YOUR ROOKS in the opening. White is just one move away from this. Black, on the other hand, is at least four moves away. But to take advantage of a position like this Morphy needs to ACT FAST before Black catches up in development.
|
|
The allies decided to challenge the White Bishop with b7-b5. What would you advise Paul to do about that? Remember - ACT FAST!
|
|
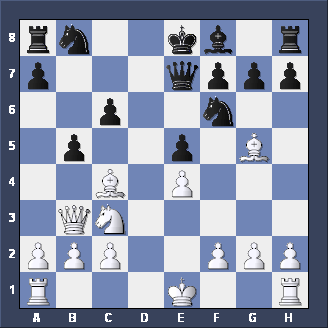
Morphy played a KNIGHT SACRIFICE!! Nc3xb5 was his move, and Black decided to accept: c6xb5. What came next, do you think?
|
|
White's move, fairly obviously, was Bc4xb5+, reaching this position. Morphy has SACRIFICED a Knight for two pawns. What does he have in return? Firstly, he still has a big lead in development. Secondly, he's opened up the position against the Black King - and Black is still a very long way from castling on the king-side. Thirdly, Black has an immediate problem: how should he get out of check? There are only two moves worth considering: Nb8-d7 and Ke8-d8. Moving the King looks pretty dangerous, and in fact White can, for instance, play Bg5xf6 followed by Qb3-d5, TRAPPING the Rook in the corner.
|
|
So Black interposed his Knight - Nb8-d7 - and Morphy had to decide what to do next. Look for the quickest and best way to get your rooks into play.
|
|
The best move is clearly to castle on the QUEEN SIDE. (Some people get so used to castling on the King Side that they forget they can go the other way as well!) Stop and look at Black's pieces. The Knight on d7 CANNOT move - it is PINNED. If the Knight on f6 moves the Queen is lost - it's also PINNED. The Bishop on f8 has no moves at all. The Rook on h8 can only move to g8. So it's hardly surprising that White has a forced win here whatever Black does. And what fine judgement by Morphy (and maybe also by you!) to reach this position!
|
|
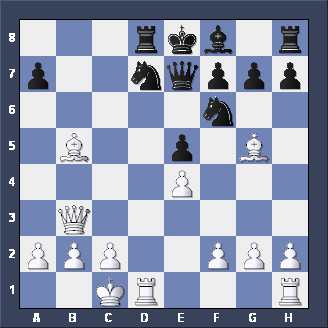
The Duke and the Count played the most obvious defense: Ra8-d8, and Paul had to decide how to continue. He has a forced win now, but he still has to ACT FAST!
|
|
This isn't really a SACRIFICE - assuming Black takes with the Rook White will be able to take back whenever he likes. But there's no hurry. The Rook will be PINNED so won't be able to run away.
|
|
|
|
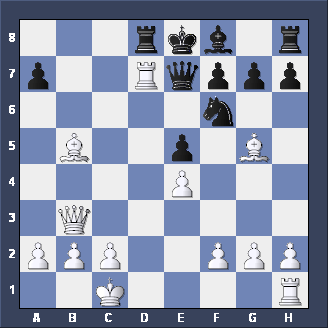
Instead Morphy took the opportunity to bring his last piece into the attack with Rh1-d1. Now Black is almost completely paralyzed. His Rook on d7 and Knight are both PINNED, his Bishop has no squares and his other Rook only one - useless - square. And White is now THREATENING to win at once by Bb5xd7+. All he can do is move his Queen.
|
|
|
|
|
|
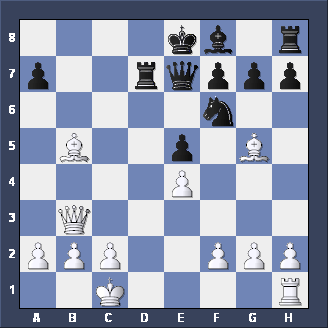
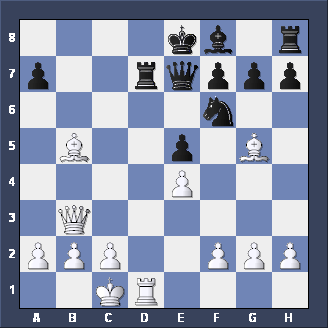
It's CHECKMATE, isn't it? No - wait a minute - the Black Knight can take it. So Morphy's blundered! He's lost his Queen! Is he going to let his opponents win? (You should always be nice to Dukes!) Is he trying to get the game over with before the second half of the opera starts? Have you seen yet what Morphy had in mind?
|
|
|
|
Just stop for a minute and admire this beautiful position! Morphy SACRIFICED his QUEEN to DECOY the Black Knight away from the d-file and allow the Rook to come down and deliver CHECKMATE. I hope you managed to find the QUEEN SACRIFICE as well as the CHECKMATE!
|
|
|
Let's look again at what you can learn from how Morphy won. We'll revisit a few key points in the game.
|
|
|
This is, as Morphy demonstrated, a poor move which left them in a very difficult position. If you're playing a strong player you're not going to get away with making up openings as you go along. Players who are ambitious to do well spend time studying (which means UNDERSTANDING, not just memorizing moves) openings to make sure they will always get at least an equal position from the start of the game. Be warned, though. There are lots of chess teachers out there who think openings are what you should study most of all. Don't believe them.
|
|
|
By accurate play Morphy has developed his pieces quickly while playing moves which prevented his opponents doing the same thing. Do you remember when he played Qf3-b3? Yes, he moved a piece twice in the opening, which you've probably been taught not to do. But, by doing so he forced Black into playing his Queen where it blocked his Bishop and made developing his King side and CASTLING impossible.
|
|
|
You might think this was a POSITIONAL SACRIFICE (making a small material investment to gain an advantage in position). But it's also possible that Morphy had CALCULATED that he was in fact winning by force after the SACRIFICE. From here to the end of the game Black's moves were all more or less forced so it wouldn't have been difficult for White to look ahead. CALCULATION IS IMPORTANT!!
|
|
|
You'll remember that White CASTLED here (on the Queen side) while the Black King is stuck in the center with no hope of ever castling into safety. Important lesson from this: you MUST castle early in the game - especially in open positions like this. Kings in the middle of the board are just not going to survive.
|
|
|
Morphy had clearly seen the QUEEN SACRIFICE coming up in this position (otherwise Bb5xd7 wouldn't have been the best move). It's quite possible he'd seen it several moves before that. Learning to CALCULATE, to LOOK AHEAD in this way is THE most vital skill you need to develop to become a good chess player. This means, very often, looking at two (or more) moves, CALCULATING each one and then deciding which is best. To get the most out of chess you MUST learn to do this in your games, not just sometimes but EVERY MOVE in EVERY GAME.
|
|
|
 
|